I painted the boards in a grey and white chevron and mounted the navy frames to the boards and attached some clips so I can change out snapshots whenever I want.
First step, cut your wood to size. I wanted mine a few inches bigger that my frames all the way around so just measure accordingly.
Next I painted the boards white.
This picture is a little hard to see the lines but once paint is dry I measured out the board and drew a line with pencil down the center horizontally and the one vertically. Then I cut the squares in half again by drawing another evenly spaced line vertically through both sections. I kind of depends how tight you want your chevron to be.
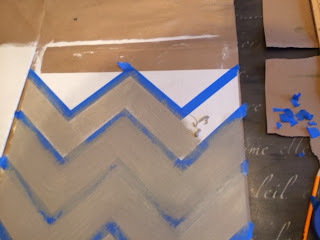
Taping can be a little tricky, you just want to make sure all of your points match up and intersect at each of the points on your squares and I used exact o knife to make sure all of the points were exact.
I painted a kind of sloppy coat of grey paint on, I just used a cheapie chip brush on this because I wanted it to be a little distressed looking.
Peel off your tape and Voila! Beautiful chevron background for free!! Next I mounted the frames directly to the wood using liquid nails and just set a bunch of heavy books on top overnight.
My kids loft is ever changing and will change again but for now I like this new addition!! :)
Linking to


These frames are so cute--they'd go perfect in my house. I'd love it if you came and shared them at the Do Tell Tuesday party at mabeyshemadeit.com Hope to see you there!
ReplyDeleteThose are super cute. Great job!
ReplyDelete