Friday, January 31, 2014

Quick Goodwill makeover

I love goodwill....sometimes.  I hate the smell in there but I have found some fantastic things.  It's usually a quick 5-10 minute trip when I go drop off my donations.  I got this round tray for $1.99, I already had the rectangular one.  2 quick coats of dark walnut spray paint and I have new kitchen cabinet accessories.  Yay!  

This had a little bend in the bottom but doesn't matter, just put it where no one can see it!  :)  


Thursday, January 30, 2014

Pantry Love

I love organizing!!  Here are a few before and afters for some pantry projects.  Must be functional but why can't it be pretty at the same time?  Glass containers are from walmart, baskets mostly from Target, a few from container store.  I love that place but the closest one is an hour away so not a frequent stop!!  


Bench makeover

The ugly table I bought for my breakfast nook transformation also came with a bench that I wasn't going to use in the kitchen but I do have a perfect spot outside by the front door.  I really hate sanding and priming so used Cece Caldwell chalk paint instead.  Make sure to clean surface well.  I used TSP to make sure to get all dirt and oil off surface.  One time I got a little gung ho on a kitchen chair and didn't wash good first and all the little oil spots came shining through, not a great look.  I used Seattle Mist on the top and Mississippi mud (discontinued but kind of light tan) on the bottom.  2 coats of each and then I followed with a water based Polycrylic.  


After 1 coat still a bit transparent
Now comes the fun part!!  I printed out a graphic I liked at graphics fairy and then sized it at block poster.  This site is so cool.  You can take any graphic and size it to letter sized paper and print it out, then just tape it all together!!  There are several different tutorials on ways to transfer on graphics fairy as well.  I like this method because I have all the supplies.  It is time consuming and your hand will kill when you are done but the result is awesome!!  
First print off your graphic, then trim the edges so the graphic meets seamlessly, then tape together.
Flip it over and take some chalk and rub it sideways all over the backside, make sure to cover everything you want to transfer.  Gently shake off excess chalk.  

Now flip it over and center it where you want it and tape down with painters tape.  
Take a ball point pen and trace anywhere you want to transfer.  I just do the outline and then hand paint with craft paint.  Press really hard.  This is what it looks like when you trace it. 


Now just paint inside the lines!  I just used a dark brown craft paint with a small brush.  I wanted mine a bit distressed so I put a coat of polycrylic over the top before I added glaze.  You have to seal chalk paint.  I didn't want to wax since it was going outside so that's why a chose a sealer.  Next I sanded it down a little just to distress the paint a bit.  Instead of glaze I used a dark walnut stain over the top, brushed it on and then wiped off excess.  I love how it gets in all the edges where I sanded.  Then just seal with outdoor sealer and Voila!  Isn't she a beauty??


Wednesday, January 29, 2014

Breakfast Nook Part 1

It's no secret....my home is ever changing.  I want a kitchen overhaul.  We've been in our home for a little over 3 years and I've never really loved our kitchen.  So I've changed it little by little but I'm still not loving it.  My pet peeves are the cabinets and the breakfast nook.  I don't like the cabinet color and there is just not enough storage.  Solution #1, I converted the closet under the stairs into overflow kitchen storage, it's right around the corner so it makes sense.  I would really love to paint the cabinets white but I'm chicken, also I would then definitely have to paint the entire room.  Plus I really want to add on to the cabinets all the way to the ceiling, and paint everything one color.   I definitely do not have the time or money to do that right now, but still itching to paint...would you do it?  Paint the cabinets I mean.  Thoughts?
 I updated some of the decor on top of the cabinets, I really want to add in some gray, it's just so pretty!!  Plus I feel like I've been fighting against the colors in our house.  When we moved in, all of my decor was reds/beige/gold.  The house was already painted very happy colors which didn't work with anything I had.  Some of the paint has stayed but I have since painted A LOT of our house.  The kitchen/living room was bright yellow.  No thank you.  I like the colors I painted 2 years ago but I am just ready for a change!!  Usually what happens when I get the itch.....I get a paintbrush and put a swatch on the wall and boom, I'm committed.  One thing I will say about myself, once I start a project, I am obsessed until it's done.  I hate clutter and unfinished business.  Problem is, everything else falls to the wayside while I'm in the middle of something.
So....changed out some decor, I like it.  Next thing is the breakfast nook.

Breakfast nook before 
 I've been pinning and searching like crazy for a corner breakfast nook.  The area we have to work with is small and the back door is right there so there has to be an open walkway.  This table is so small, I wanted something with more seating and more table space.  I wanted the coventry set by Ballard but with a $2200 price tag it aint happening.  So DIY project it is!  I started searching and came across this on Craigslist.  Isn't it a beauty??  NOT!!!!
Had these chairs from old table, reupholstered and added nailhead trim 
So my thought was to paint the sides and table base with some CeCe Caldwell paint and refinish top and upholster the backs.  Tutorials coming soon....

I have a new chandelier on order and would like to paint and lighten it up a little bit.  I can now fit 7 people!!  Yay!!
One thing leads to another.....up next:  PAINT!  Should I keep some red or change it up?  Guess it depends on cabinets, I need some input!


Thursday, January 16, 2014

Craft Room Reveal/Faux Wood tutorial


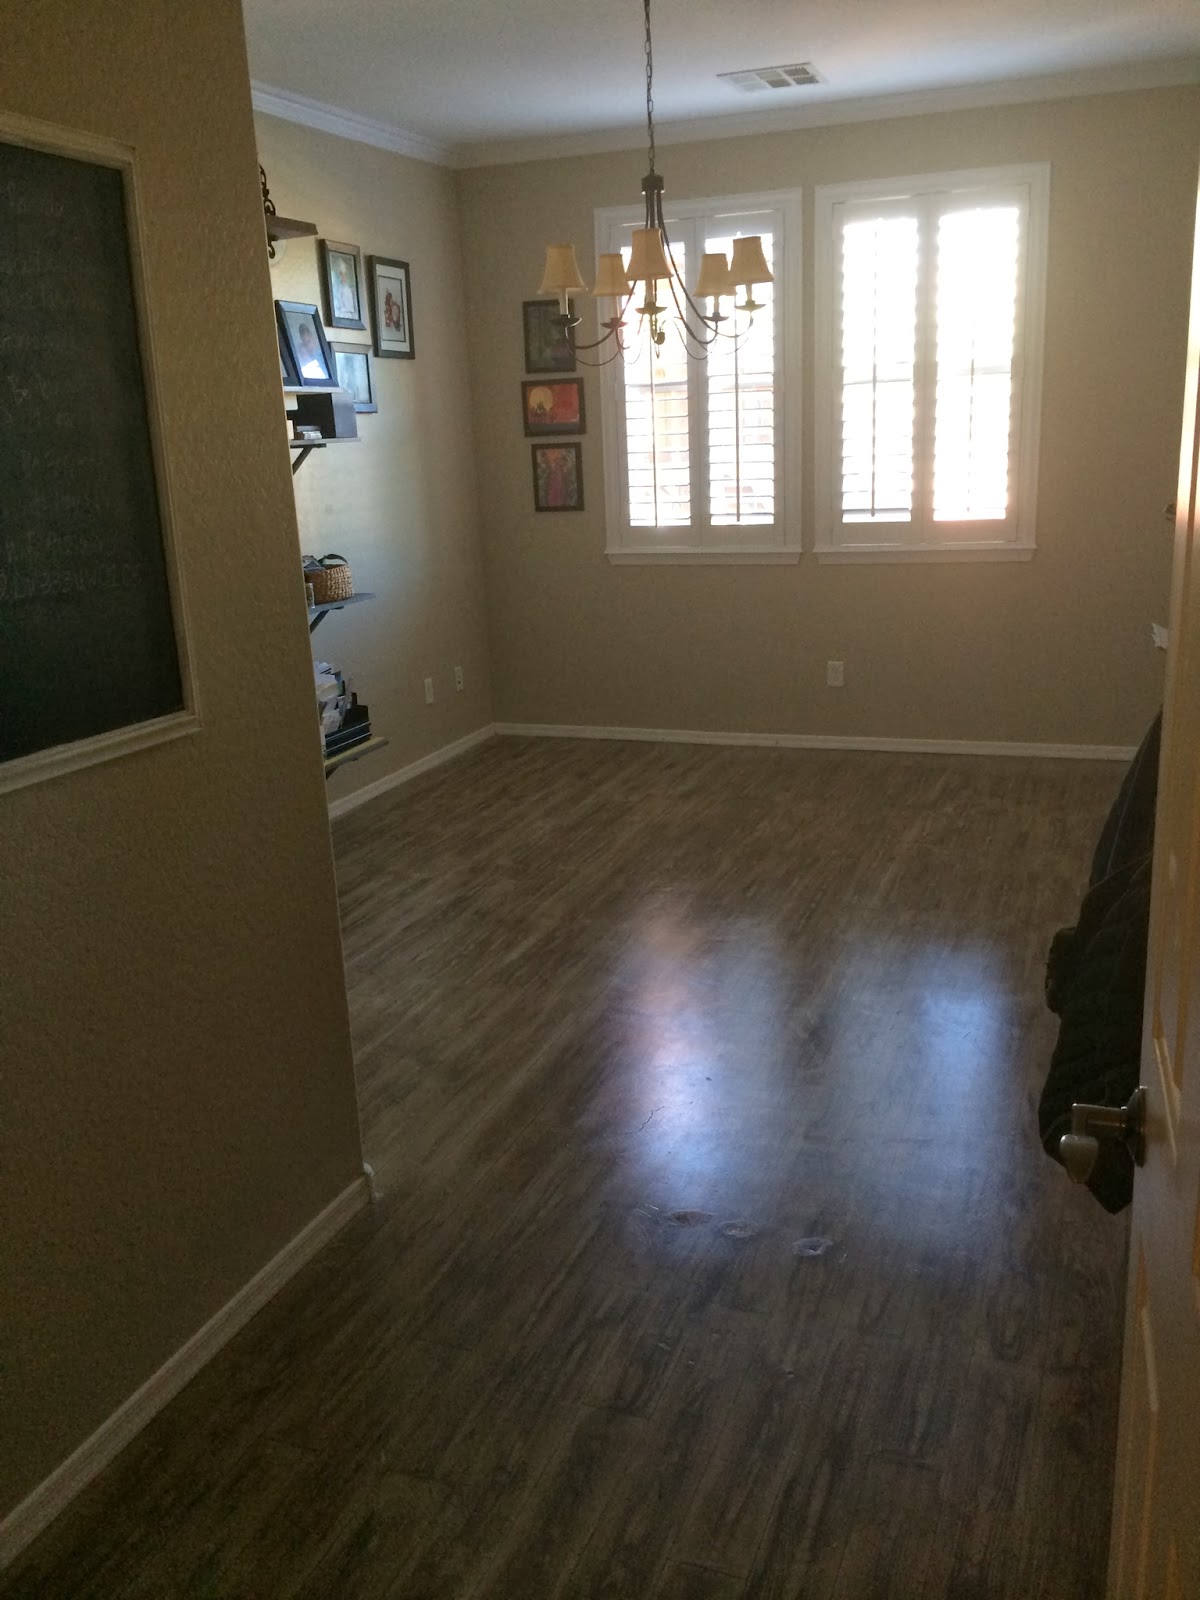
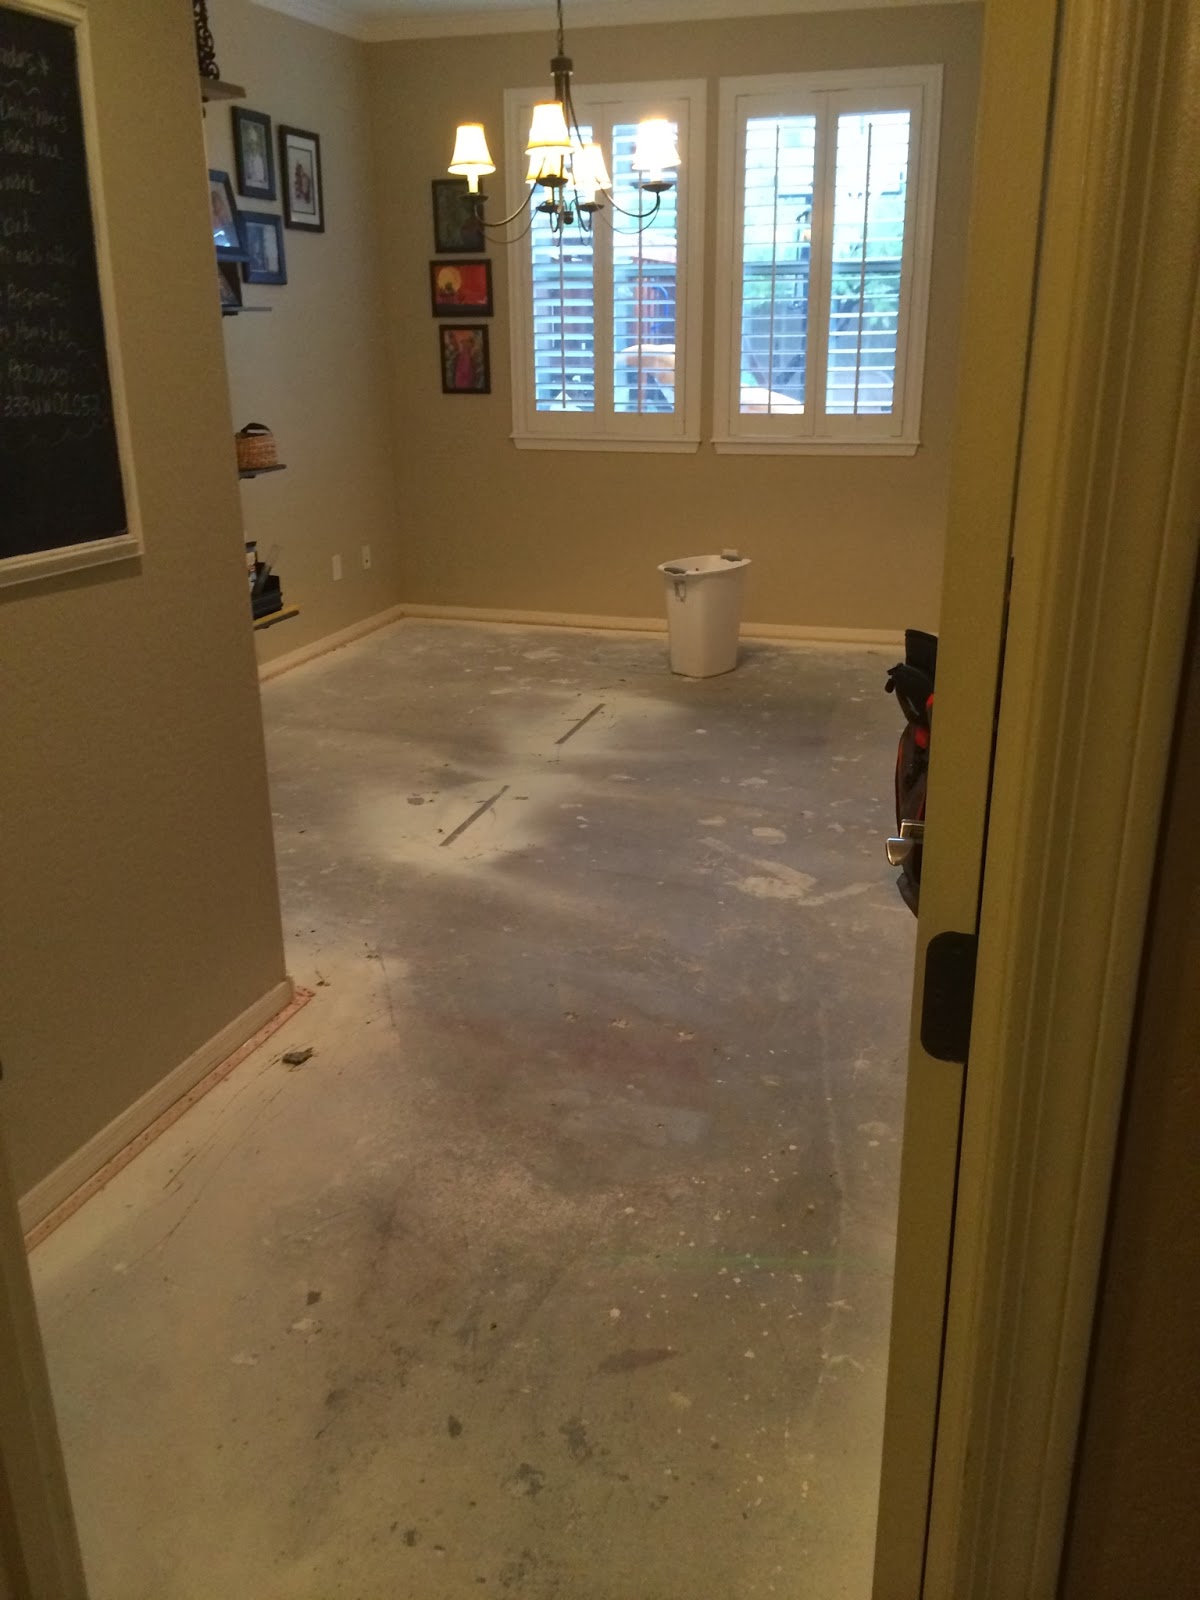
Craft Room Before....Yikes!!  This was a great space just for me and maybe 1 or 2 kids, I wanted to accommodate lots of friends at the same time!  Changes need to be made....


We have 2 utility rooms on our lower level right across from each other.  The first one I already showed you, that is hubby's office/bike shop.  This one is my craft room/mudroom for the kids.  There has been carpet in both for the last 3 years....not so good.  It was so nasty!  Oil stains, paint stains, you name it.  I was so happy when the first one was done but boy was that a lot of work!!  My room wouldn't be quite as bad since I am constantly rearranging and I had already painted it so all I had to do was the floors.  I needed a full 3 day weekend to complete, I couldn't procrastinate on this one since everything had to come out, and there is a lot of junk packed into one room.  All of it went in my dining room and I wouldn't be able to stand looking at the mess so I needed a chunk of time.  Dad to the rescue, taking the boys on a camping trip....perfect!!  Dave helped me move everything out beforehand and rip out carpet and prep the floor.
For prep, you must remove all nails and tackboard.  Second, wash floor with degreaser and rinse, I use TSP.  Then patch all the holes from carpet with concrete patch and let cure.  Sand any rough patches.  Make sure to really smooth out any rough surfaces....they will show!!  There is one spot that didn't get done right away so had hubby patch quick and being impatient did not sand all the way down and you can totally see the spot!  GRRRRR.  Oh well, lesson learned.
Craft Then you have to etch, this is very important so product will adhere to concrete.  You can use pre made etch, home depot or lowes has one.  We just used Muriatic Acid from the pool cuz it's cheap and we already had it.  :)  He mixed probably about 10 parts to one.  Be careful, this is wicked stuff!!
Make sure to wear protective gear while using and rinse very well.  Let floor dry completely and now it's time to prime!!  I used a primer called Seal Krete lock down, 2 coats and let completely dry in between.  Then I did 2 coats of Porch/concrete paint.  Make sure it's paint and not stain.


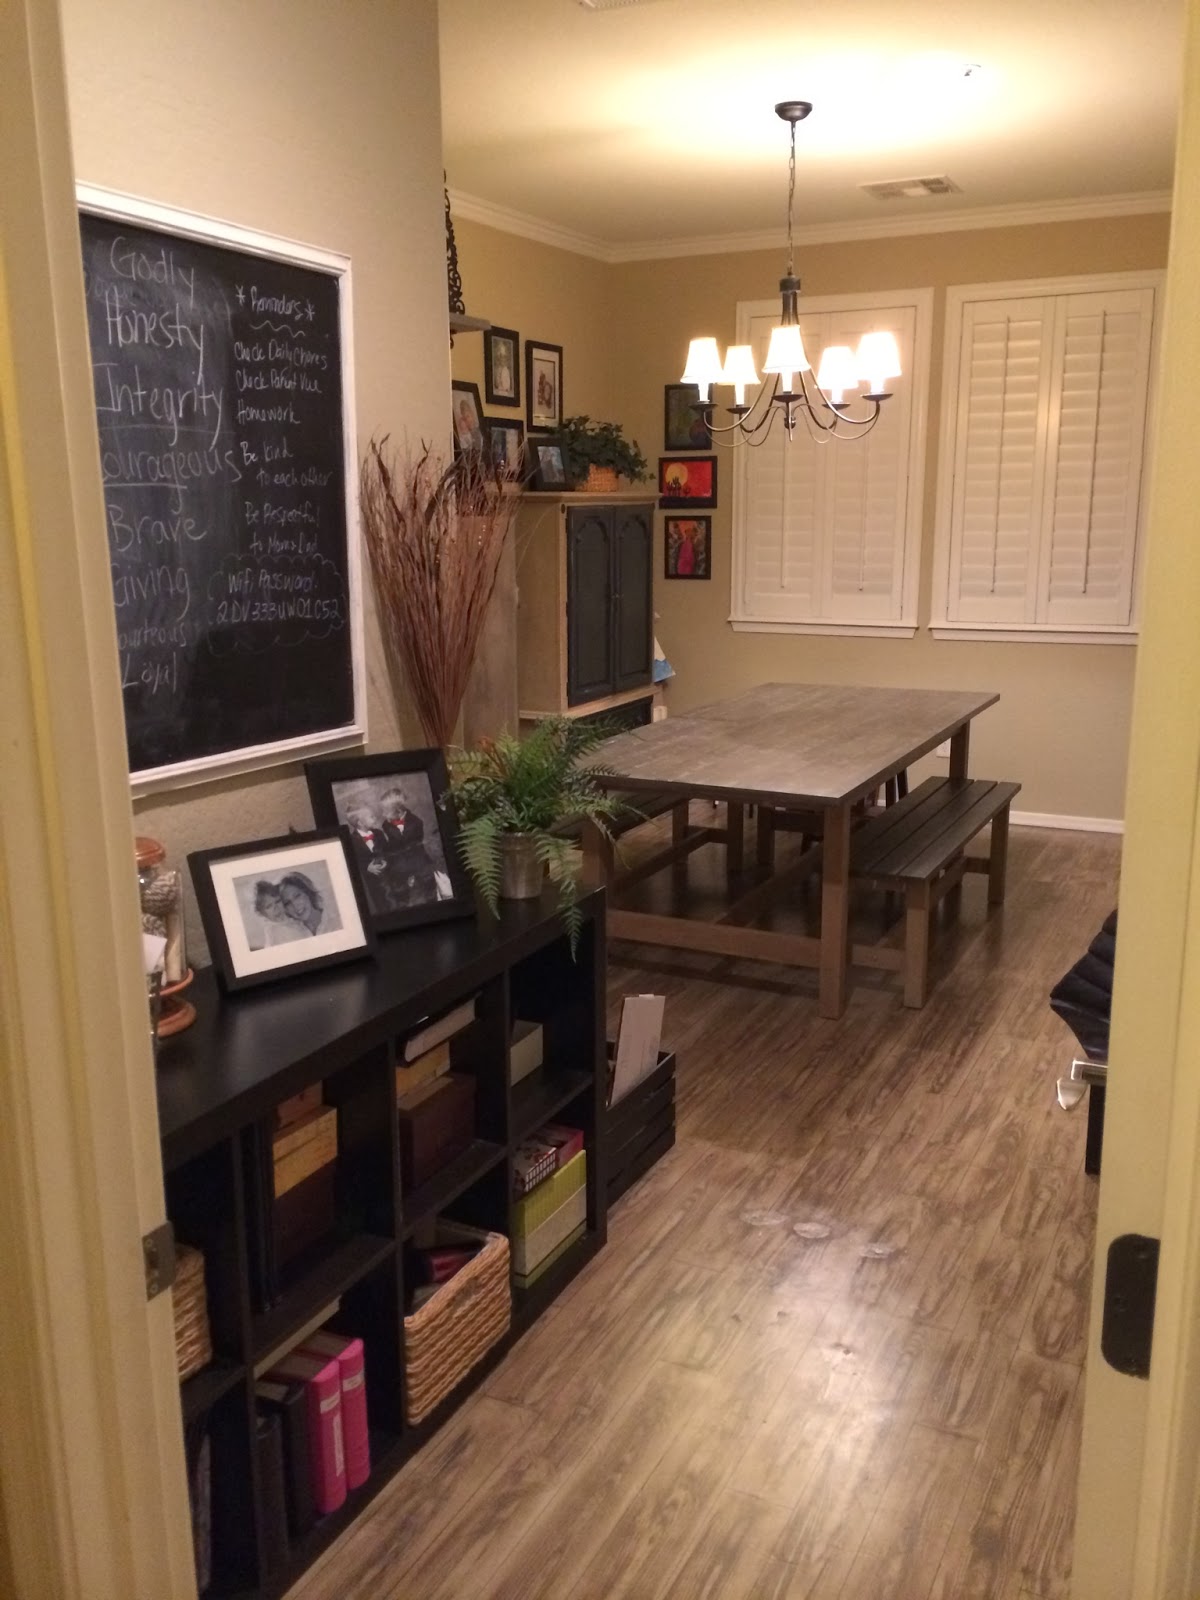
Now comes the fun part!!  I used a piece of trim that was about the size I wanted for the planks and did a random pattern starting from one corner and went back and forth with my pattern.  I used black sharpie and just traced the board.  Buy a big pack of sharpies!!  I went through about 7 I think.  


 I used 3 different colors of glaze (Modern Masters clear glaze and mixed 3 different tones to get dimension I wanted)  to do the faux wood grain along with multiple tools.
You will need a Wood grain set, found at Sherwin Williams, and I used a strie brush to soften the lines. I worked with about 3 or 4 planks at a time.  I highly recommend doing a practice run on a piece of cardboard or poster board to get the look you want.  
First step:  Brush on lightest color all over planks you are working with and rub it in with a rag lightly misted with water.  You don't want it wet, just a light spray.  Work the color in and then take other 2 colors and do random streaks of each over the top of first color.  Now take your wood grain tool and starting at one end of plank, drag through your glaze rocking back and forth until you get the grain you want.  Now take your strie tool and soften lines a bit.  Finally take the hand scraping tool (if you want a distressed look) and drag through randomly to achieve final look.  Continue working back and forth from one end of room to the other.  Make sure to end each plank so that you are not overlapping glaze, you don't want it to get muddy looking.  Have a second damp rag handy to wipe down wood grain tool every couple sections.  


 Let dry overnight.  You want to make sure and use a good sealer.  I used the Seal Krete Clear Seal in Matte Finish.  I could not find the Matte at big box stores, I found it at Dunn Edwards.  Still has a little shine but I did not want a high gloss.  I did 2 coats of seal with Polyurethane pad (no roller marks) and followed manufacturer instructions on dry time.  Wait at least 24 hours before moving stuff back in.  Yay!!  I love it!!  And the floors are a breeze to clean.  Now I just need all matching cute baskets and it will be done.....


Supplies:
Mop bucket
Etching compound or acid 
Protective gear
Primer
Porch/Concrete Paint 
Paint accessories 
Poly Applicator 
Glaze 
Rags 
Spray bottle 
Faux Finishing tools 
Concrete Sealer 

Linked to 
http://www.mabeyshemadeit.com/tell-tuesday-11-pattern-giveaway/